|
New Faucet Installation Tips and Tricks for the Family Handyman
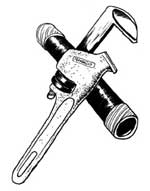
New faucet installation is a great way to modernize an old bathroom or kitchen and give it a face-lift. There are many styles available to choose from to fit any décor. In order to perform a faucet installation as part of a renovation one must first remove any existing faucets and prep the area for the new faucet. Once the old faucet is removed you also need to rid the area of any residual caulking or build up that may be present from around the old faucet. Silicon remover works great and is available at your local hardware store. Sinks can be one, two, three, and four-hole varieties. Make sure you buy the proper faucet to fit your sink according to the number of holes it has.Read all Manufacturers Instructions:There are many little pieces of hardware involved in installing a new set of new faucets. The instructions that come with the product should be adhered to closely. Read all installation instructions before you begin! If no instructions came with the set of faucets you purchased you can download them online. Each manufacturers faucet installation instructions are different. Tools you may need for this handyman project include: A pair of pliers, adjustable wrench, utility knife, plumber's putty or silicon caulking, flex water hoses, and Teflon or plumbers tape.
Step by Step Handyman Installation Process:
Miscellaneous Tips for Installation:If a sprayer hose is part of the faucet you have purchased you should install it first. It is quite difficult to do this attachment after the faucets are connected. Be careful to pay attention to the positioning of the sprayer hose as you attach it to the water supply. It needs to be able to pull up and go down freely and not be wrapped around anything. It is bound to be a bit stiff and curly but once you are able to run some hot water through it it should straighten out.
In most cases you can use putty instead of silicone caulk and the clean up is much easier but there are exceptions. Be sure to read the manufacturers instructions for the proper materials to use for the product you have purchased. Flex hoses are a great invention! They make plumbing jobs a breeze. We have used them for all our plumbing jobs and have had no problems with them. Be sure not to over tighten the nuts on various hoses. It could be disastrous to a handyman faucet installation. The rule of thumb is to hand tighten and then turn them an additional 1/2 to 1 full turn. Finally, clean up any residue from the putty or other sealant and shine faucets with a soft cloth.
Return to Family Handyman Questions Home Page from Faucet Installation Page
|
Family Handyman Quick Links

Looking for a Toronto plumber? Hiring a plumber can effectively fix your plumbing!
Download free Handyman clipart

Download free Handyman Business forms